How to Achieve the Most Photogenic First Dance

A picture is worth a thousand words; and a fabulous wedding photo that encapsulates all the emotions of that 1 night is priceless. Not to mention that they stick around long after the wedding and serve as treasured memories for the years to come. It’s no wonder that finding a great photographer is such an important element when planning the event. But besides reading all the reviews and scrolling through endless portfolios to hire the most talented professional, how else can you guarantee the best shots of your first dance?
We’ve got you covered. Here are our favorite tips to making your sure your dance is camera-ready!
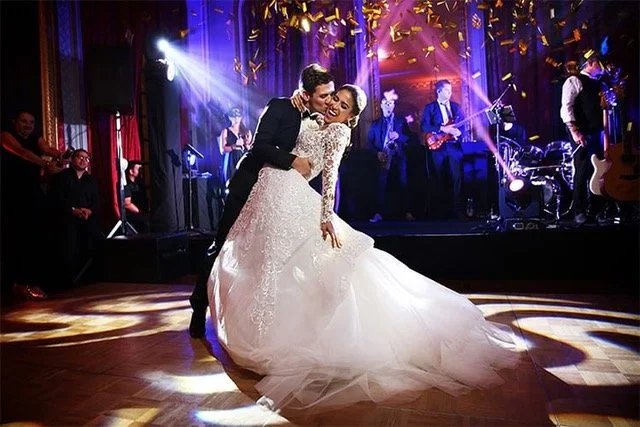
1. Follow your partner with your eyes. Simple, yet super effective. There really isn’t much more to it. No matter your steps, either in an embrace or side by side, always watch your partner.
How it photographs: Not only does it keep your eyes up and off the floor, it makes you more present and allows for more interaction between each other. It will provoke more genuine reactions in the moment, whether it’s a nervous smile or gentle whispers of encouragement or sharing a laugh if a mistake is made. These are the emotions that equal great photos!

2. Finish those lines. Most likely you will come across a piece of choreography in your dance that requires separation from the dance embrace and involves some kind of arm styling. You might even hear your instructor utter the phrase, “finish the line.” This basically translates to: fully stretch your arm by straightening each joint to its maximum. First start at the elbow joint, then the wrist joint, followed by all the finger joints. I usually tell my ladies, use the shoulder to shoulder rule if you ever have to open up the arm. For example, If you have to open the right arm to the side, start by touching your left shoulder with your right hand, then move the hand across the chest to touch the right shoulder, before sending to the side and “finishing the line”.
How it photographs: These kind of techniques ensure that you reach the end result of the pose before moving on to the next step. It gives a fullness to the pose and makes the couple look more confident and comfortable. Especially for those who don’t know what to do with their arms when they aren’t in a dance hold.
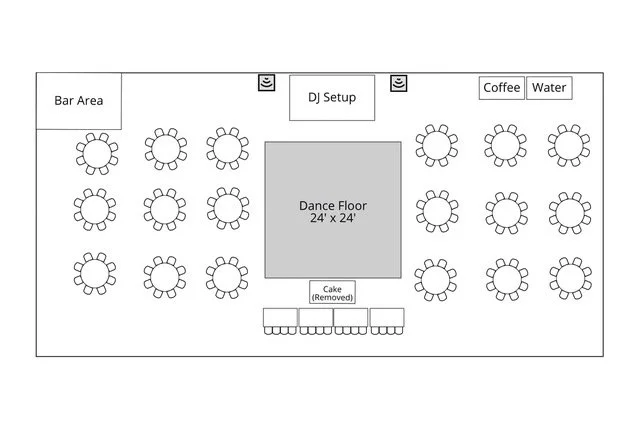
3. Orient yourselves to the space. Set yourselves up for success from the very beginning. Figure out the orientation of the room you are dancing in ahead of time. Where will the guests be seated? Which sides have no guests at all? Where will the photographer be placed? Once these are figured out, inform your teacher so they can choreograph accordingly and get the best lines in the most effective place. Once the dance is finished, send a video of the dance to the photographer. This way they know when the best moments to capture will be and the best spots to place themselves in order to catch those moments.
How it photographs: Make the job of the photographer easier. If they already know what to expect, chances are they will be better at getting that perfect moment.
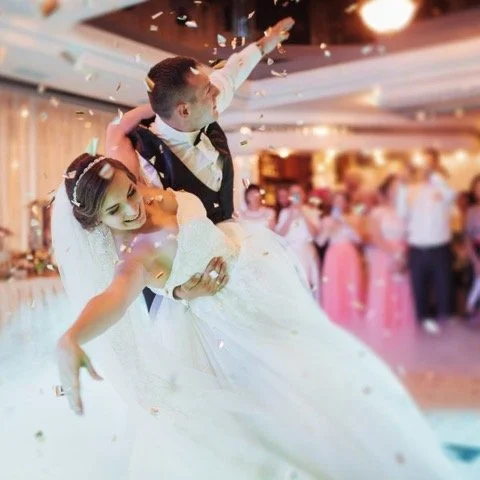
4. If dancing is a language, don’t forget the punctuation. There will be certain moments in your routine designed to get a reaction from the audience and a good photo. These usually include dips, lifts, leans, and more. Take your time. Don’t rush through these moments. Remember, make the photographer’s job easy by giving them the time to actually take the picture. If you rush out of the poses too soon, you may lose the moment!